Some customers send feedback to Strongink that they cannot understand the instruction for the PKM-1 pen clearly,
This article is a new version instruction with pictures to guide you finish a perfect PKM-1 series pen step by step.
PKM-1 pen is twist type ball point pen designed by Strongink. When you unpack the poly bag for the kit, you will see 10 parts as below photo.
1x Pen top cap
1x pen clip
1x Band
1x Twist mechanism
1x Coupler
1xpen tip
2xpen tubes
1x Parker type pen refill.
1x Spring
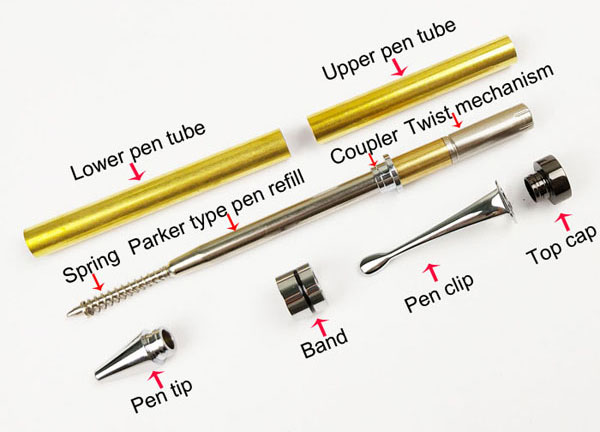
Before we start the pen making, we need this clear that the longer tube is for lower barrel
All right , now we start pen making.
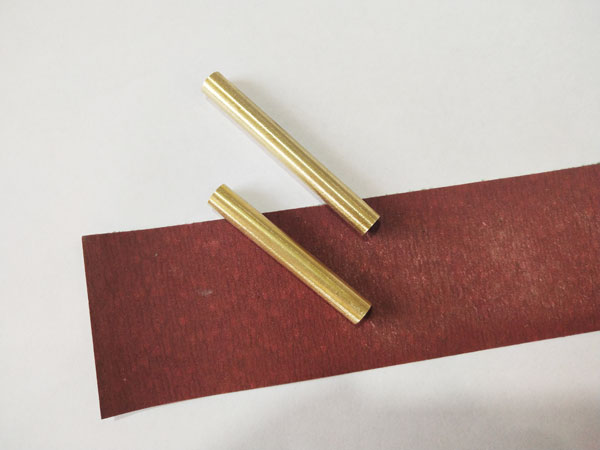
Step 1.
Sanding brass tubes,
Sanding the two brass tubes with 240 grit sanding paper evenly on the surface, which will let you glue the pen tubes strong enough from coming unglued from the pen blanks, when you process them in the fowling steps.
Step 2.
Preparing the pen blank
Select a pen blank to match the finish of the pen kit, size from 5/8" or larger square stock, mark the 2 blank to the length of the tube and add 1/16”each end for squaring off.
Please note: the shorter brass tube is for upper barrel; the longer brass tube is for lower barrel.
![]()
Step 3.
Cut pen blanks
Cut the pen blanks along the line with band saw, bench saw etc.… whatever cutting tool as long as you can cut it into two along the line.
![]()
Step 4.
Drilling the two blanks
Mark the center and Drill 8mm holes lengthwise through the blanks
![]()
Step 5
Glue the pen tubes
Spread glue over the tubes, insert the blanks with a twisting motion to spread the glue evenly inside and center the tubes lengthwise inside the blanks
.jpg)
Step 6.
Squaring and trimming the blanks
When the glue is dry, square the ends of the blanks. Use a 8mm barrel trimmer. Take the excess material down flush with the ends of the brass tube. (do not trim beyond
the length of the lower tube since this may interfere with operation of the mechanism and assemble)
![]()
Step 7. (Optional)
Chamfering the brass tube
Chamfer the four ends of the brass tube, clean all the burrs caused by last step, this step is optional, if no burrs on the ends.
![]()
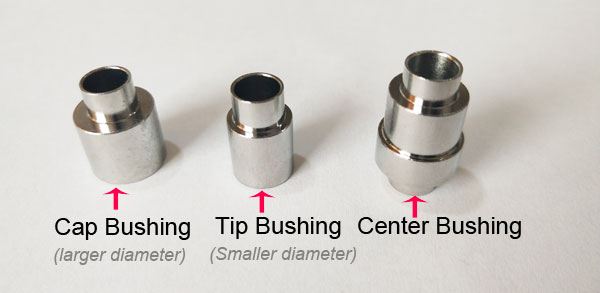
Step 8.
Turning the blanks
Mount the cap bushing, upper barrel blank(shorter one)and center bushing on the mandrel as indicated in Diagram B.
![]()
NOTE: The center bushing has two shouldered diameters made to match the wide and narrow bushings. The second blank should be mounted next to the center bushing, and the third (narrow) bushing mounted last
(See Diagram B).
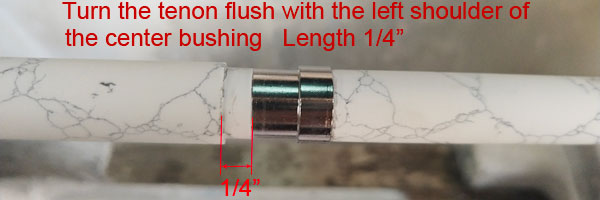
Step 9.
Turning the Tenon.
The diameter of the tenon should match the narrow diameter of the center bushing. To ease the turning of the tenon, slide the center bushing off the mandrel and turn it around 180 degrees. Next, slide the center band onto the bushing (flat end towards the wood) and replace it on the mandrel as indicated in Diagram B.
The length of the tenon can be approximately 1/4" which is about 5/32” less than the width of the center band.

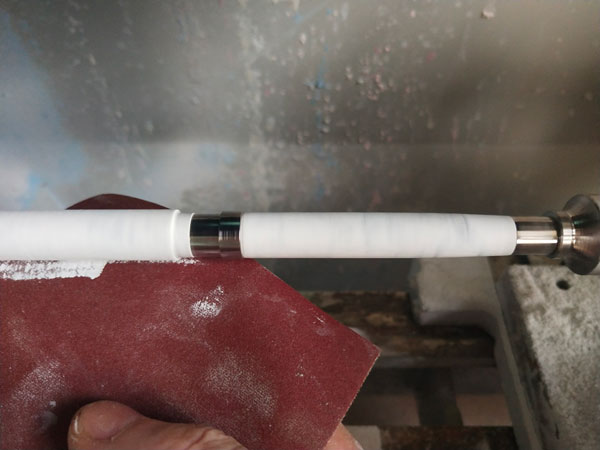
Step 10.
Polishing the blanks
Polish the two pen blanks with sanding paper with 240 grit, 320 grit, 600 grit, 800 grit 1000 grit,1500 grit,2000 grit,2500, 5000 grit.
If you are polishing stone or acrylic pen blanks, polishing with wet sanding paper will let you get perfect result.
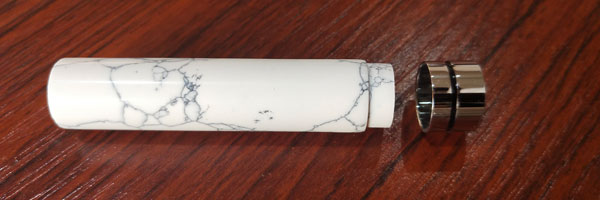
Step 11
Glue the band,
Spread some glue on the tenon, and insert the band, please note the direction of the band
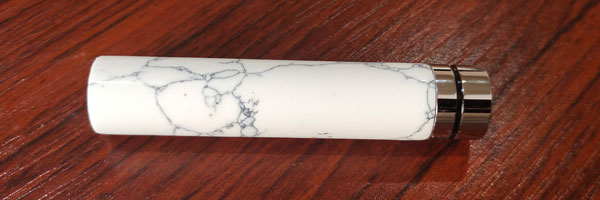
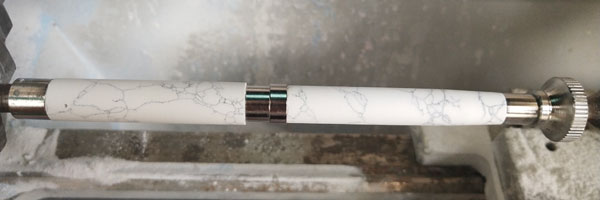
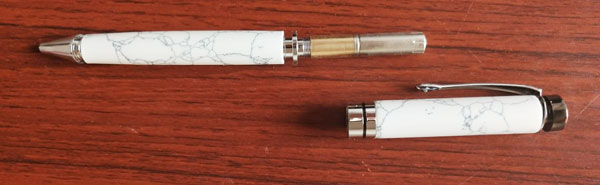
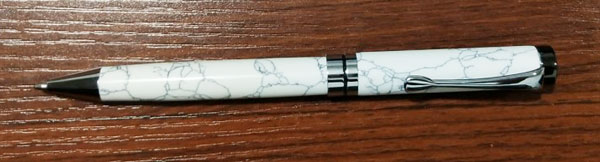
Step 12
Assembling the pen
please assemble the pen as below photos show.
Author: Strongink Pen Kits